Bayberry Hills: (508) 394-5597 | Bass River: (508) 398-9079


Add your title here
This is the text area for this paragraph. To change it, simply click and start typing.
The Championship Course At
Bayberry Hills
Bayberry Hills is a pristine golf course located in West Yarmouth, Massachusetts. The layout includes
27 holes (Red, White, & Blue Courses) with championship tees allowing the course to be played at up
to 7200 yards. The facility offers the ultimate golfing experience and practice facility.
Scorecard
Bayberry Hills Championship Red
- Our goal for all golfers is 2 hours per nine holes
- Always maintain pace with the group in front of you
- We will have player assistants to help you keep pace
Course Tour
Hole 1
Hole 1 is a slight dogleg right, downhill to a large green. The green is guarded by a bunker on the right side, and mounds of rough on the left
Hole 2
Hole 2 is a dog leg left par 5. A strategically placed tee shot is the key to this hole, with a bunker protecting the right side of the fairway, and another one protecting the front right portion of the green.
Hole 3
Hole 3 is the first par 3, with a huge multi-tiered green. There is no bailout on this hole, with bunkers placed on every side, and no room to go long.
Hole 4
Hole 4 is the only water hole on the course, making it our number 1 handicap. It is a straight away par 4, with a pond to the right of the fairway, as well as another pond in front of the green. This calls for an accurate tee shot and approach.
Hole 5
Hole 5 is a shorter par 4, slight dog leg to the right. With a couple stand-alone trees guarding the right corner of the fairway, the angle of your tee shot is most important. This green also has multiple tiers.
Hole 6
Hole 6 is a strong dog leg to the right. There are four bunkers on this hole, with two on the corners of the fairway, one in the middle of the fairway, and one protecting the green.
Hole 7
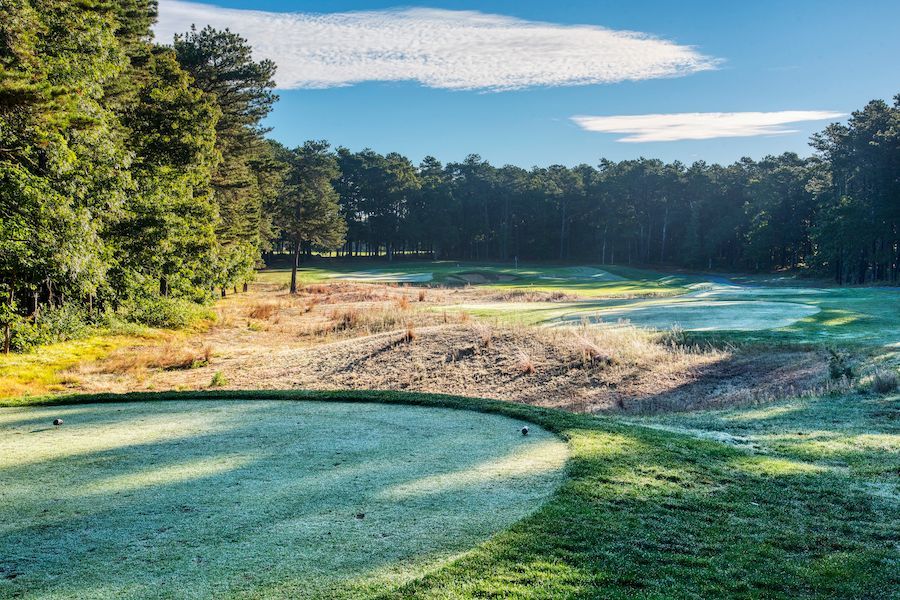
Second shot to a small green plays best from left side of fairway. Favor left side of green to avoid right trap.
Hole 8
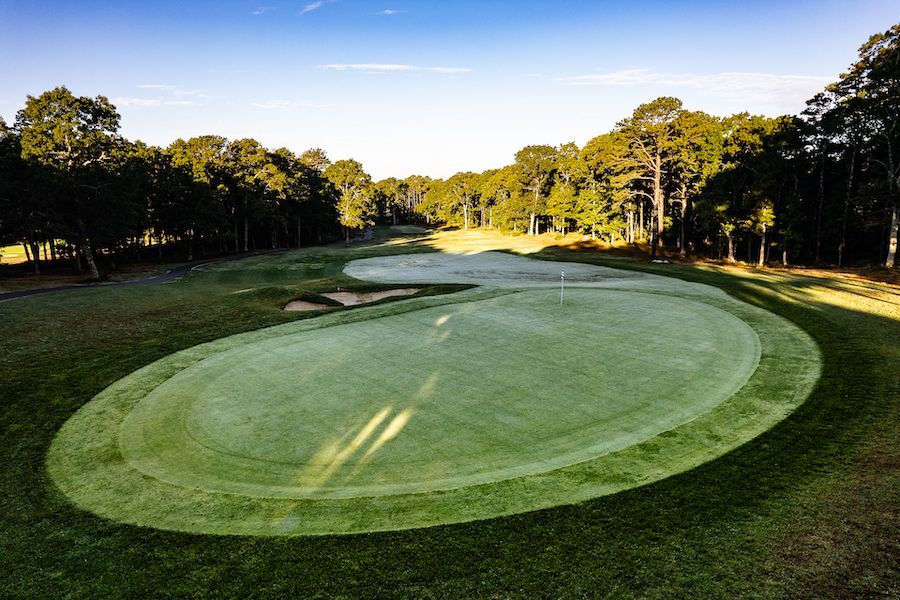
Hole 8 is the second par 3 on the front 9. It plays slightly up hill, with a bunker guarding the whole right side of the green.
Hole 9
Hole 9 is a straight away par 4, uphill towards the green. There a bunker guarding the right side of the fairway, with some bailout room on the left side for players tee shots.Hole 9 is a straight away par 4, uphill towards the green. There a bunker guarding the right side of the fairway, with some bailout room on the left side for players tee shots.
Hole 10
Hole 10 is similar to our opening hole. A par 4, slight dog leg, downhill towards the green. A strategically placed tee shot will allow for you to attack this green, however be aware of the waste are lining the right side on your approach.
Hole 11
Hole 11 is about as straight forward as it comes; a straight par 4 with trees lining either side of the fair, all leading to a large green.
Hole 12
Hole 12 is a par 3 with waste area leading up to a bunker, and then the green. Precision with the short game is most important with this hole.
Hole 13
Hole 13 is our shortest par 4. Slight dog leg to the left, with a small valley in front of a large green. A lone tree on the right side of the fairway blocks a bailout area, so players will be forced to choose between driver, and laying up off the tee.
Hole 14
Hole 14 is a strong dog leg to the right. The two tiered green is surrounded by waste area and bunkers, again calling for a solid second shot, and precise short game.
Hole 15
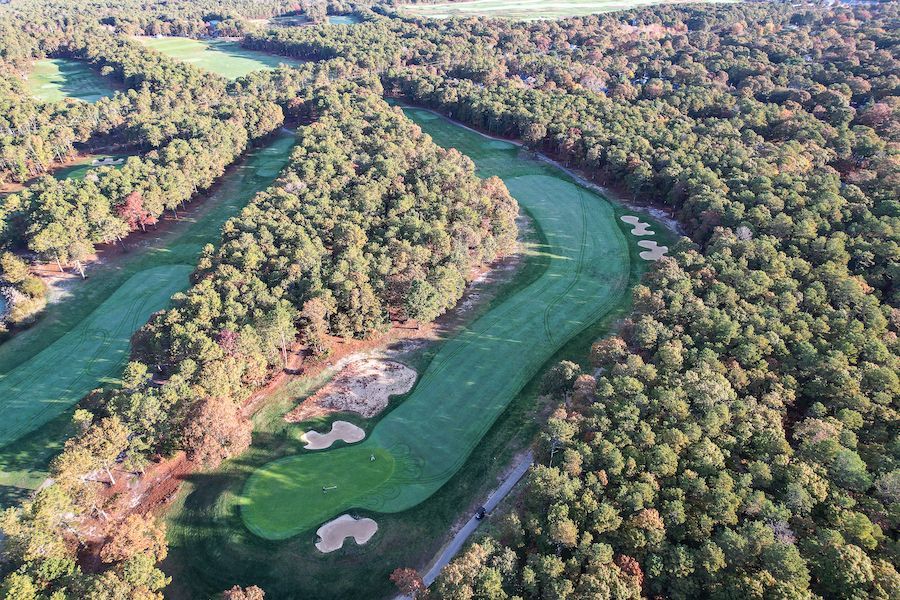
Hole 15 is a longer par 5. This hole has many ways to play it, with a waste area and trees blocking an easy lay-up. Players must choose wisely to lay-up on the far right side of fairway, or try and take the “alley” between the waste area and the woods. The green is large, but strongly sloped from back to front.
Hole 16
Hole 16 is a dog leg to the right par 4. The green also slopes from back to front, with a bunker in front of the left side.
Hole 17
Our final par 3, hole 17 has a long but slim green, with bunkers on either side. This par 3 calls for the most accurate tee shot.
Hole 18
Our finishing hole a dog leg left par 5. A well positioned tee shot can allow for players to be aggressive when choosing how to play their second. The rest of the hole is uphill towards one of our smaller greens. This green is also two tiered, with a bunker in front of the right side.
© 2025
All Rights Reserved | Yarmouth Golf
Designed & Hosted by Club Prophet Engage